Overflow’s Gift Entry module streamlines offline donation management—whether you’re tracking physical checks, cash, or Donor Advised Fund (DAF) contributions. From batching to reconciliation and reporting, this guide covers everything you need to make the most of this powerful feature.
Skip to Section:
Accessing the Gift Entry Tool | Creating a New Batch | Advanced Features | FAQs
Creating a New Batch – Skip to Step: 1 | 2 | 3 | 4 | 5
Take a look at how it works:
Accessing the Gift Entry Tool
- Log in to the Dashboard.
- Click "Gift Entry" from the menu on the left.
- Explore the Gift Entry page:
- 🗃️ You’ll see an overview of all your previously created batches.
- 📊 Check out high-level stats, including batch totals, statuses, and dates.
- 🔍 Use the filters to narrow down your view by dates, batch names, or statuses.
Creating a New Batch
Step 1: Start a New Batch
- Click the "➕ Create New Batch" button.
- Name your batch and enter the amount you deposited to the bank.
- 💡 Use a descriptive name to keep things organized (e.g., “Dec 2024 Sunday Donations”)
-
(Optional) Add a batch description to include any helpful details for internal reference.
- 📝 This can be useful for tracking or noting important information.
Step 2: Choose Your Input Method
Gift Entry supports 2 methods to add offline gifts:
- ✏️ Manual Entry
- 📂 CSV Upload
Step 3: Enter Offline Gifts
Manual Entry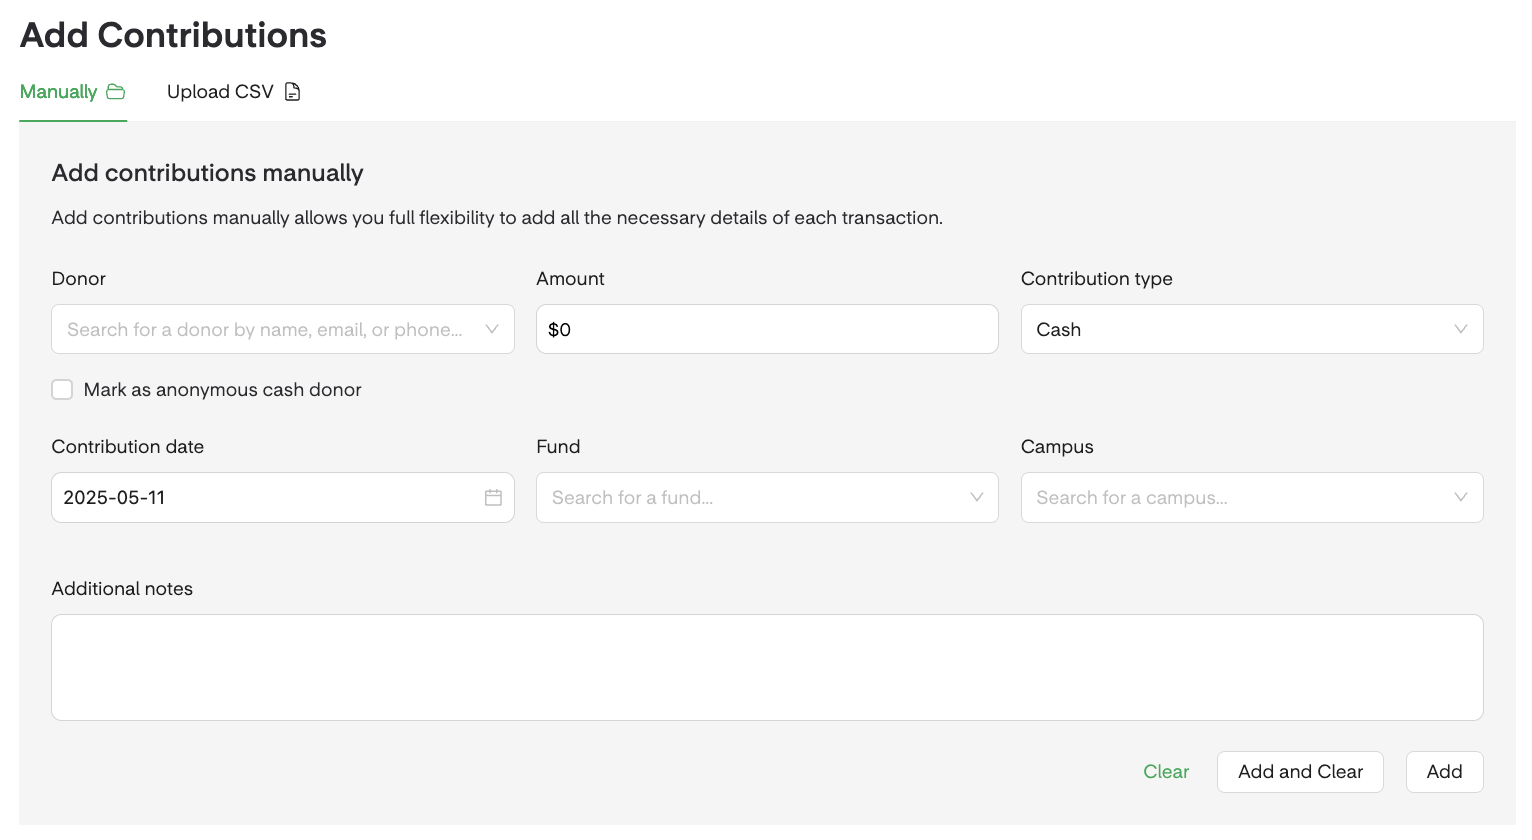
- Select "Add Gift" and fill out the following fields:
-
Donor Name: Search for existing donors or scroll down the list to find a donor who already has a Donor Profile on Overflow.
-
👤 “Add New Donor”: Choose this option to enter the donor’s information. A new Donor Profile will be automatically created in the People module, even if no contribution is attributed.

- 👥 Multiple Donors: If more than one name appears on the same donation (like a check), double-check that neither donor already has an existing profile to prevent duplicates.
-
🤫 Anonymous Donors: Check this box is the donor's name is unknown. (The gift will sync to your CRM using the primary contact’s name or phone number from your Organization Settings.)
-
👤 “Add New Donor”: Choose this option to enter the donor’s information. A new Donor Profile will be automatically created in the People module, even if no contribution is attributed.
- Amount: Up to $9,999,999
-
Contribution Type: Choose from “Cash,” “Check,” “Other,” or “DAF.” (All gifts entered via Gift Entry are considered tax-deductible.)
- ✍🏽 If Check (Optional): Additional fields to enter the Check Number and Check Date will appear.
- 🏦 If DAF (Optional): Additional fields to enter the DAF Institution and DAF External Grant ID will appear (e.g., Fidelity Charitable - 12345678)
- 📌 Qualified Charitable Distribution (QCD): While there isn't a separate category specifically for QCDs, we recommend adding a note for reference. (Giving statements include wording that covers QCDs, ensuring your donors receive the proper acknowledgment.)
- Contribution Date
- Campus: Designate the gift to a specific campus, campaign, or top-level fund (e.g., “Mountain View Campus”)
- Fund: Select the fund to which the gift should be assigned (e.g., “Building Fund”)
-
Notes (Optional): Add any internal notes related to the donation (up to 250 characters).
- 📝 While there isn't a separate category specifically for QCDs, we recommend adding a note when recording the gift for reference.
-
Donor Name: Search for existing donors or scroll down the list to find a donor who already has a Donor Profile on Overflow.
- Choose how to add the donation:
- ✅ Add and Clear: Adds the donation to the batch and clears the fields for a new entry.
- ➕ Add: Adds the donation to the batch while keeping all the entered information in place.
- The gift will appear in the "Contributions" section below.
CSV Upload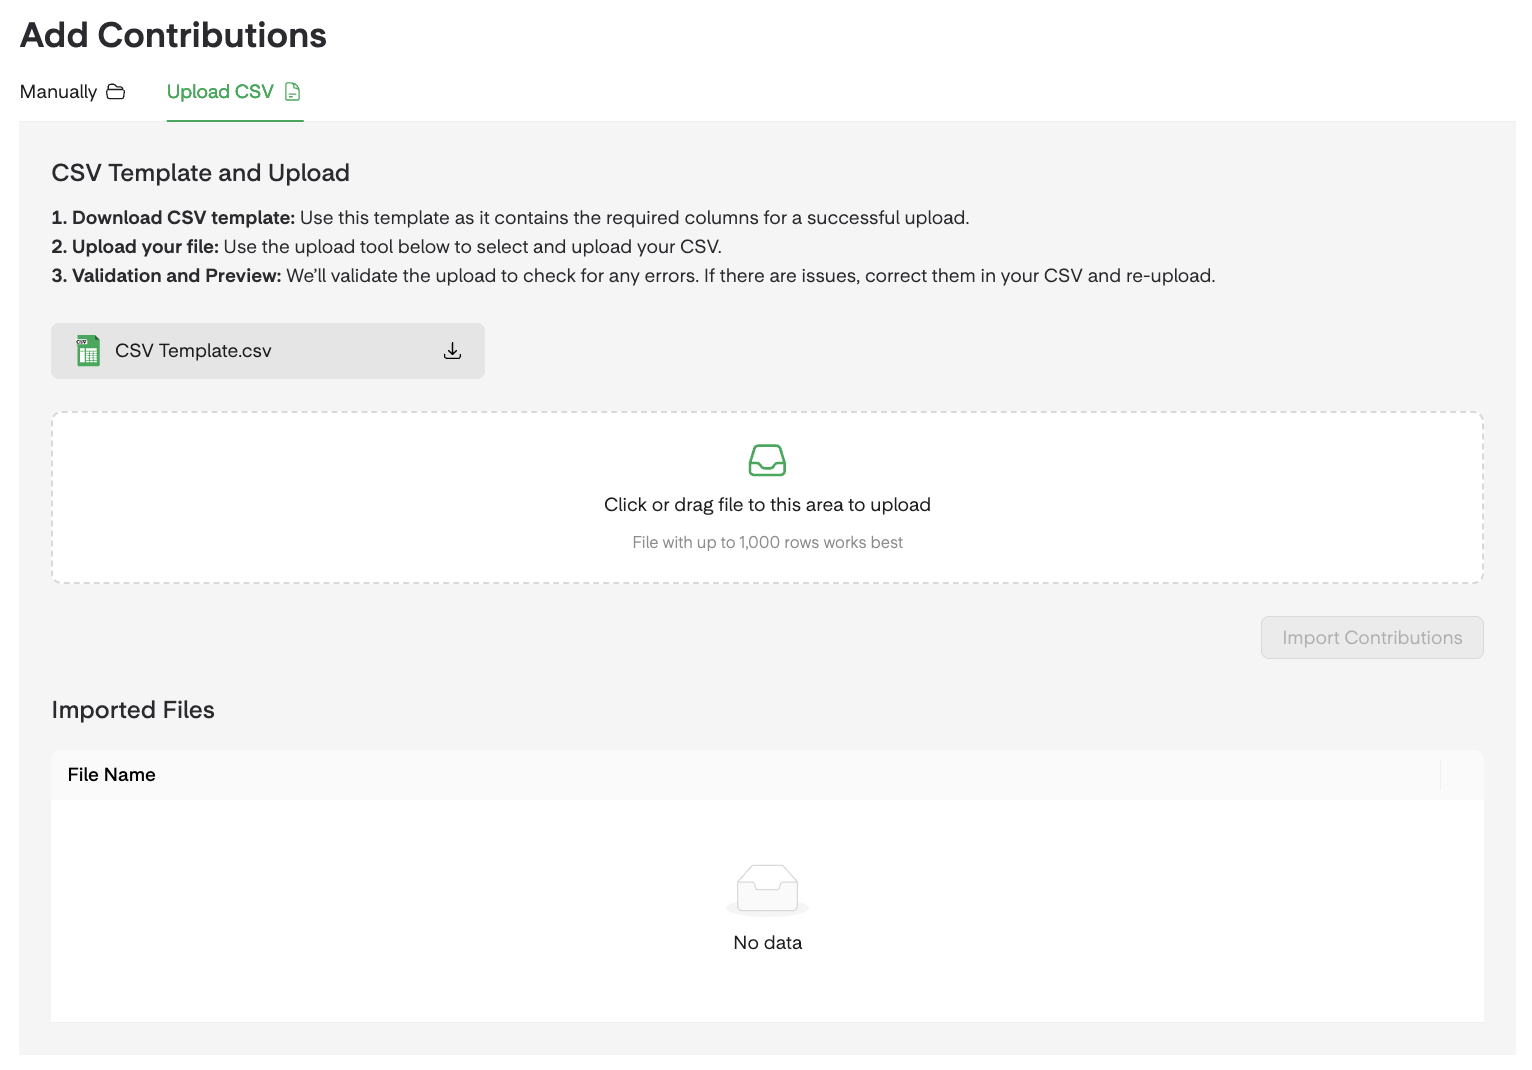
- Prepare your CSV file:
- 📑 Make sure it includes the following columns: Donor Name, Amount, Fund, Check Number, Contribution Date, and Notes.
- 💡 We recommend downloading the CSV Template from the input option and always using the provided format when uploading gifts.
- Upload your CSV file:
- 📂 Click the "Upload CSV" tab, choose your file, and review the data to make sure everything looks correct.
- Confirm and import:
- 🔄 You can replace or delete the file if needed.
- ✅ If everything is correct, click “Import Contributions”. The gifts will be automatically added to the batch and can be viewed in the "Contributions" section below.
Step 4: Monitor Progress
Each batch includes a Progress Chart that updates in real time as you add and reconcile contributions.
- 📊 Scroll to the top of the page while entering contributions to see how much has been entered and how much is left to reconcile.
- 🗃️ At the top of the page, you’ll also find a breakdown of the donation value by campus and fund.
Step 5: Close the Batch
Once you’ve made sure that all gifts are entered correctly and the total amount matches your target batch amount, you can close the batch.
-
What Happens When You Close a Batch:
- 🔒 The batch will be locked to prevent deletion or any further edits. (It cannot be reopened.)
- 🔄 Donor Profiles, statements, and reports will be automatically updated.
-
Important:
- ✏️ After closing a batch, you can still edit the Batch Name, Batch Date, Fund (Campaign and Subcampaign), and Pledge Attribution.
- 📧 To request changes to any of the following, please email Support with the Batch ID, Donor ID(s), and Contribution ID(s):
- Donor Name (including Anonymous donors)
- Gift Amount
- Contribution Type
- Contribution Date
Advanced Features
Filtering and Exporting Data
- 🗂️ Use the filter options to view specific gifts or batches.
- 🔍 Filter by Date Range, Donor Name, or Fund Allocation.
- 📁 Click "Export" to download the filtered data as a CSV for further analysis.
Voids and NSF Checks
If a check is returned due to insufficient funds or if you need to void a donation for another reason, please follow these steps:
- 🗃️ Go to the batch containing the contribution.
- 🔍 Click the ellipsis (⋯) to the right of the contribution you want to void.
- 🚫 Select "Void" from the menu.
Editing Batch and Contribution Information
-
Editing a Batch
- 🗃️ On the Gift Entry page, locate the batch you want to edit.
- ✏️ Click the ellipsis (⋯) to the right of the batch and select "Edit".
-
Editing a Contribution
- 🗃️ Go to the batch and scroll to the "Contributions" section.
- 🔍 Locate the donation you want to edit.
- ✏️ Click the ellipsis (⋯) on the right of the gift and select "Edit"
FAQs
Are Donors Notified When a Gift Is Entered?
📧 Yes! All Manual Entry donations automatically generate a confirmation email for the donor, as long as there’s an email address on file at the time of the donation.
- If there’s no email address on their Donor Profile when the Gift Entry batch is closed, a confirmation email will not be sent.
- However, you can add their email address in your Dashboard for future donations, if their Donor Profile is labeled with a “Created” tag and is exclusively linked to Manual Cash donations.
Will Manually Added Transactions Appear in My Connected CRM?
✅ Yes, transactions you add manually through Gift Entry will sync to PCO, Bloomerang, Salesforce, Rock, and CCB CRMs.
- Once you add a new offline gift, it will sync to your CRM, but no updates will be sent afterward. This means that any changes you make after the batch is closed, including editing gift details, will not sync.
- For all integrations except Rock and Virtuous, voided transactions will sync as well.
What If My Batch Doesn’t Balance?
🔍 Double-check all entered amounts and make sure all gifts are included. You can also use the “Contribution Amount” indicator to spot any differences.
Can I Delete a Batch?
❌ Not quite! Batches can’t be deleted. The best approach is to close the batch and add a note explaining any discrepancies. This helps keep everything clear and easy to track.
Is There a Limit to the Number of Gifts in a Batch?
No, Gift Entry supports unlimited gifts per batch, giving you maximum flexibility.
How Do I Process a Credit Card Donation If a Donor Calls With Their Card Information?
💳 You can use the Virtual Terminal to process the donation manually.
-
Virtual Terminal is available upon request. If you'd like to have it activated, please reach out to your Account Manager or contact our Support team.